So, you rolled your new kayak and need to get back inside, but now it’s full of water. How can you reenter the sinking boat? Bail it out with your water bottle? Try to push the hulking mass back to shore?
Although you can use scupper plugs, the key is to not get into this situation in the first place. If you’re going kayaking, you need to know how to make a kayak more buoyant.
Related Article: Most Stable Fishing Kayak
Top Rated Floatation Bags


Last update on 2025-12-11 / Affiliate links / Images from Amazon Product Advertising API
Buoyancy, Outriggers and Stabilizers
You probably already realize this, but kayaks float without the aid of any extra equipment. Sit-on-top boats utilize a sealed hull that is completely unsinkable, and sit-in kayaks float so long as water does not come over the cockpit rim to flood the inside.
So what is the point of making a kayak more buoyant? If a sit-in kayak capsizes, it will fill with water and something must be done to prevent the entire hull from filling. Otherwise, the boat will sink.
Many sit-in kayaks, especially touring models, have a sealed bulkhead in the rear that prevents them from sinking. But the water that gets into the cockpit will still make it impossible to paddle the boat, so it’s best to prevent it from filling up in the first place.
The best option to add buoyancy to your kayak or canoe is with outriggers or stabilizers. It’s not the cheapest method though.
DIY Methods for Extra Buoyancy
All of the techniques for making a kayak more buoyant rely on the same principle – fill some of the space in the hull with air to prevent the boat from taking on more water. The methods below will teach you multiple ways to make a kayak more buoyant.
Flotation Bag
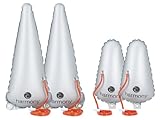
The simplest solution is to add flotation bags. These urethane-coated nylon bags look like thick, triangular balloons. Their biggest advantage is that they’re shaped to fit into the far ends of the bow and stern of your kayak, spaces that typically aren’t very useful as storage space anyway.
While flotation bags have a very simple design, it’s the little accessories they carry that make them easier to use than other flotation solutions. Most have a long inflation tube extending from the bag, so you can inflate it when it’s wedged into the end of the kayak. Inflating it in places also helps it to fill up more space at the end of the boat.
Most flotation bags are actually too large to insert into the kayak fully inflated; they won’t fit through the hatch or past the foot pedals. Before inserting the flotation bag into the kayak, blow it up about three-quarters of the way to give it some structure, and then inflate it the rest of the way once it’s in place.
Purpose-built flotation bags also will often have attachment points that allow them to be clipped into the kayak. This prevents them from being pushed out when the boat capsizes and fills with water.
The major downside of flotation bags is the extra costs. If you don’t want to spend the money on a couple of them, there are some other options that can be used.

- 10-gauge urethane material that won't leak or delaminate
- 38" inflation tube length, Sold individually
- Small Dimension inflated: 31"L x 10"D x 22"W, 3"W at tip
- Medium Dimension inflated: 37"L x 11"D x 19"W, 3"W at tip
- Large Dimension inflated: 47"L x 14"D x 24"W, 3"W at tip
Last update on 2026-06-09 / Affiliate links / Images from Amazon Product Advertising API
Beach Ball Method
There’s not much difference between a beach ball and a kayak flotation bag; both can be quickly inflated to take up some space in the kayak and prevent it from filling with water in the event of needing to do a water exit or getting swamped by a wave.
However, beach balls have the downside of being spherical when inflated, which is not the best shape for shoving into the end of your boat’s bow or stern. You’ll have to leave it partially deflated, and it probably won’t stay in the position you intending for it.
Inflation can also be a problem; since it’s missing that handy inflation tube, you’ll have to blow it up before you push it into the end of the kayak. If the boat capsizes, a beach ball is also liable to slip out since as it’s lacking any attachment points.
While it won’t work as well as a purpose-built flotation bag, a beach ball is better than nothing, and is an option for those who don’t want to spend much money.
Pool Noodle Method
Pool noodles are designed to keep swimmers’ heads above water, which means they’re perfectly constructed to prevent your kayak from going under.
They’re also really customizable and can be cut to fit the ends of your kayak better than a beach ball. Just tie a few short pieces together with some rope, and you can make something that closely resembles the shape of a flotation bag.
Since they require no inflation, they’re easier to set up than either a beach ball or a flotation bag. Be absolutely sure that the type of noodle you use does not absorb water though; noodles are made of a variety of foam materials, and one that absorbs water won’t provide as much flotation.
Conclusion
Knowing how to make a kayak more buoyant will prevent it from sinking and will make it easier to reenter after a wet exit.
The option that’s best for you will come down to how much money you want to spend, how comfortable you are with DIY solutions, and how much you care if other kayakers laugh as you insert pool toys into your boat at the put-in point (they’re just jealous they didn’t think of it first).