
You’ve just purchased a new kayak and are ready to take it to the water, but how are you going to transport a kayak without a roof rack?
Fortunately, the process is fairly painless, and it could save you a few hundred dollars – money that will be better spent getting yourself to epic put-in points or upgrading your kayak later on.

Last update on 2025-12-11 / Affiliate links / Images from Amazon Product Advertising API
Why Transport a Kayak Without a Roof Rack
A roof rack can be a great symbol for a kayaker, a way of telling the world that your vehicle is used for fun out on the water. Why would anyone want to forgo that symbol of adventure and excitement?
First of all, roof racks are and extra expense, and they usually only work on one vehicle, as cars come in different widths.
Maybe you want to take your friend’s vehicle on your next big adventure because it gets better gas mileage or has more room for camping gear. But while the kayak carrier itself can probably transfer between vehicles, the bar and clips required usually cannot.
A cheaper and more versatile setup is to have no rack at all, and instead just use some straps and a little bit of foam to keep the boat from scraping your car’s paint off. This setup will only cost $10-$20, and can easily be used on any vehicle.
How to Transport a Kayak or Canoe Without a Roof Rack System
The most important considerations when strapping a canoe or kayak to your car’s roof without a rack are keeping the boat secure and preventing damage to your vehicle. To do this, you’ll need to create a buffer between your kayak and the roof, which can easily be done with a couple of pieces of foam.
What you’ll need
Pool noodles only cost a few dollars a piece and can be cut to perfectly cradle your kayak, but denser foam can be found at hobby supply stores. The only other materials you’ll need are four ratchet straps and a utility knife.

If you’re not really the DIY type, the major rack manufacturers sell pre-cut foam blocks that should fit your boat. However, they do cost quite a bit more than the kind you can make for yourself.
Constructing the Buffer
This is the only work you’ll need to do ahead of time, and once the buffer is ready, you can use it over and over. The first step is to cut a few sections of foam, which will separate your boat from your car.
If you’re using noodles, cut three sections of them to the width of your car using a utility knife. If you chose to buy hobby foam, cut an arch into two blocks that will fit the hull of your boat.
Either way, once you have your buffer, you’ll be ready to load and secure your kayak whenever you want to head out to the water.
Loading the Boat
Start by positioning the foam pieces on the roof of the vehicle; their placement is critical because not all sections of the roof have the same amount of support. Placing the foam on top of the roof’s support pillar (the part of the car body next to the door) will prevent the roof from bending when you tighten the straps down.
Now lift the kayak up to the roof, and set it on top of the foam pieces. Lay the four straps across the hull so that they’ll tighten on top of the foam pads. Open all four doors, pull each strap through the ratchet, and tighten them down.
Admittedly, getting your boat up to the roof can be the hardest part of loading a kayak without a rack. Lifting a heavy kayak onto a small sedan is hard enough, but it can be nearly impossible if you have a taller vehicle, like an SUV.
It’s also quite challenging for one person to position the boat on top of the foam pieces without them slipping off of the vehicle. Have a friend help with this step if you can.
If you need to load the kayak by yourself, one option for keeping the foam in its proper place is to run a ratchet strap or bungee cord through the center of each piece and attach them to the boat before it goes on the car. This will require a few extra straps, and you’ll need to cut a hole in each piece of foam, but it will make it much easier to position everything when you’re loading solo.
Securing the Boat
Now that the kayak is on the roof and the straps are positioned over the hull and through the doors, it’s time to tighten them down. Don’t over-tighten the straps, though; the ratchets can exert an incredible amount of force, and you don’t want to damage your roof or, more likely, deform the hull of your kayak.
Before attaching the remaining straps, give the kayak a wiggle, and then tighten the two straps going across the hull. This should remove any slack that might have been present.

For the last step, attach another ratchet strap (this won’t be load-bearing) to the grab handle on the boat’s bow. Attach the other end of the strap somewhere on the front of the vehicle; this could be to the vehicle’s frame, but sometimes there’s an attachment point that sticks out.
Then attach a ratchet strap to the stern grab handle, and secure it somewhere on the rear of the vehicle. These front and rear straps are an extra precaution to prevent the boat from twisting in the wind as you drive down the highway.
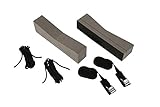
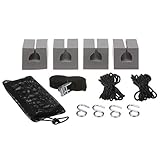
- Everything you need for kayak transportation on your car roof
- Includes: 2 foam blocks to support kayak, 2 straps with adjusting buckles and clips, and guy ropes
- Angled foam blocks cushion kayak securely and prevent scratches to your car top
- Straps are sturdy poly web with vinyl-coated clips
Last update on 2026-06-10 / Affiliate links / Images from Amazon Product Advertising API
Conclusion
Knowing how to transport a kayak without a roof rack will save you a few hundred dollars, or just help you out of a tight spot should you end up needing to use a vehicle that your rack won’t fit on.
It might sound like a lot of work, but it’s a pretty simple skill – just a few pieces of foam, four straps, and about fifteen minutes will have you on your way to the water with a boat securely attached to your vehicle.