When it comes to rappelling, there are multiple devices that can be used to get your feet back safely onto flat ground. By far, the most popular device for this purpose is an ATC from Black Diamond.
Though it’s a very simple device to use, care should be taken when learning how to rappel with an ATC. This article will serve as a guide, as to what an ATC is, and how to use it correctly.
This guide is not intended as an instructional replacement for real, hands-on training with a professional mountain guide.
How to Rappel with a Black Diamond ATC
- Ensure you have your harness on correctly, and your personal safety is girth hitched through both hard points of your harness.
- Connect your personal safety to your anchor and ensure your carabiner is locked.
- Ensure the rappel rope is safely connected to your anchor. Also, make sure the end of the rappel rope is touching the ground or reaches the anchor below. Ensure knots are tied at the end of the rappel rope.
- Connect your ATC to the belay loop on your harness using a locking carabiner.
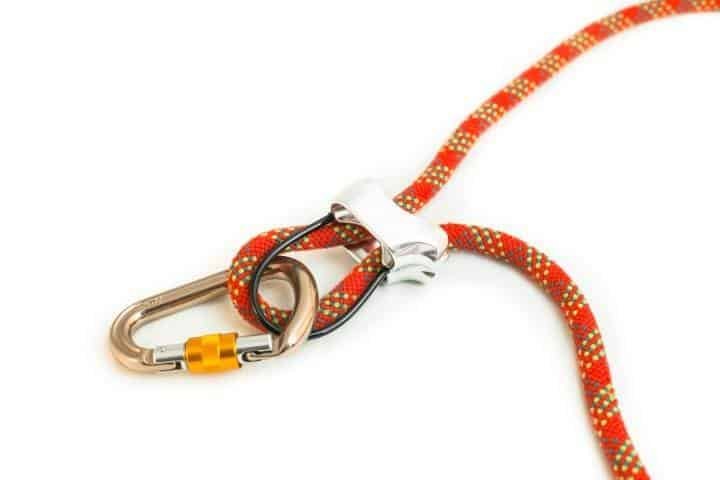
- Feed a loop of one or both strands of rope (depending on the setup, more on that below) into one or both slots of the ATC, with the section of rope going down to the ground on the bottom, and the section going up to the anchor on the top.
- Take the locking carabiner on the ATC and clip it through the rope loop that has been fed through the ATC slot. Ensure the ATC’s loop is also going through your locking carabiner. Now make sure the carabiner is clipped and locked to the belay loop of your harness.
- Perform a safety check: the helmet is on and the hair is out of the way (as to not get stuck in your ATC).
- Ensure the locking carabiner is clipped through the ATC’s loop, the loop of rope in the ATC and through your harness belay loop.
- Ensure the rope is fed through your device correctly.
- Ensure all carabiners, both on the ATC and anchor, are locked.
- Fully weight the rappel line BEFORE removing your personal safety.
- Once you have performed your safety checks, fully weight the rappel rope again, and then remove your personal safety.
- The lower strand of rope, the one that goes down to the ground, is the brake strand, and is operated by both hands. Hold the brake strand of rope tightly. This will prevent you from descending at all.
- Lean back over the edge of the cliff, then slowly let the rope slide through your hands. You will begin to slowly descend. The faster you let the rope slide through your hands, the faster you will descend.
- Lower down to the ground to complete the rappel.
While the set-up of an ATC or a similar device is relatively simple, there are multiple different situations in which it can be used, that will change its set-up. There are two main rope set-ups you’ll most likely be using when rappelling with an ATC. Below, we’re going to cover both. But first…
What is an ATC
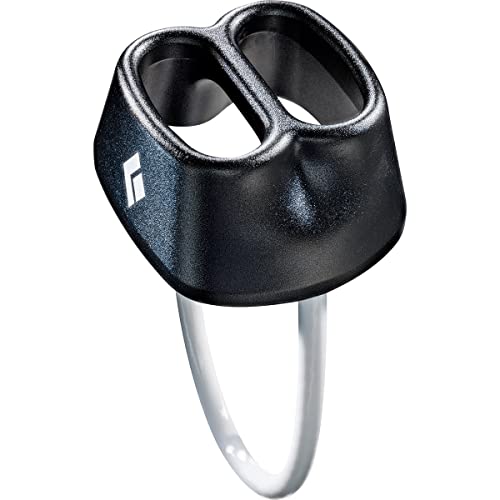
A Black Diamond ATC is a belay and rappel device made by the gear manufacturer, Black Diamond Equipment. ATC stands for Air Traffic Control.
The ATC is a friction-based belay and rappel device that uses bends in the rope and contact with the devices surface to increase friction, which then allows for much easier slowing down or stopping of the rope from moving through the device.
While Black Diamond Equipment manufactures the ATC, many gear manufacturers produce similar devices, some with different features, but all are based on the same principles.
The main competitor of the ATC is the Petzl Verso, whose operation is virtually identically to the ATC.
Petzl and Black Diamond both have a more advanced version of their basic versions. Black Diamond has a big brother to the ATC, the ATC-Guide, which includes various friction modes and auto-locking when in guide mode.
What are the Set-ups for an ATC
An ATC is designed to fit either one or two strands of rope. Whether you rappel on one or two strands will depend on your situation and needs. Operation, once the rope is loaded, is the same for both one and two strands.
Two strands of rope
Rappelling on two strands of rope means that two strands of rope will be running through your ATC, one strand in each slot.
In this case, generally speaking, the rope will be threaded through fixed gear at the top of the route or cliff, or wrapped around a natural anchor, with both ends of rope touching the ground or reaching the anchor below.
The rope will go from the ground, up to the anchor, and back down to the ground.
This can be used in situations where:
- The rappel length is less than half of the length of your rope.
- You can’t or don’t want to go back up and untie your rope from the anchor. This may be lowering off a single or multi-pitch climb where one or more rappels are used to reach the ground or descending a cliff which you won’t be ascending again.
One strand of rope
Rappelling on one strand of rope means one strand of rope will be running through your ATC, using only one slot.
This technique is generally used on rappels that are longer than half the length of your rope, and you have the ability to get back to the anchor of whatever you’re rappelling off, to retrieve your rope. It’s done by one end of the rope being tied to an anchor at the top of the rappel, and the other end touching the ground or bottom of the rappel.
This method can be used in situations where:
- The rappel length is more than half of the length of your rope.
- You have the ability to go back up and untie your rope from the anchor after the rappel is complete. This may be a rappel where the anchor is accessible via a hike back up or a cave or canyon where the rope will be used to ascend back up and out.
How to Stay Safe When Rappelling
Knowing how to use the ATC to rappel is just the beginning. Now let’s get into the guts of how to stay safe up high while rappelling!
Use a Prusik
A prusik is a length of accessory cord with both ends tied together using a fisherman’s knot to form a loop. This loop of cord is then wrapped around the rope as a prusik hitch, which is then clipped to the leg loop of the descenders harness using a carabiner.
When descending, holding the prusik so there is slack in the hitch will allow downward movement. As soon as you let go of the prusik, allowing it to tighten, it will bite down on the rope, essentially acting as a third hand, gripping the rope. This will allow you to let go of the rope, without dropping to the ground.
I consider a prusik an essential tool when rappelling. In the case of rock fall, rescue, or any other situation where you might let go of the rope or need both hands, a prusik is a life saver.
Tie stopper knots in the ends of your rope.
The most common rappelling related incident happens when people lower off the end of their rope. This is easily prevented by tying knots, called stopper knots, in the ends of your rope. These are just simple figure of 8 or double overhand knots that create a thicker point in the rope, that won’t pass through the ATC or other rappel devices.
Wear a helmet
With any vertical activity which takes place on natural rock, the chance of hitting your head on the wall, or being caught amongst rock fall is pretty high.
Especially when rappelling, it’s very easy to kick or loosen a piece of rock on the way down, only to have that rock fall out of the wall after you’ve passed it— and because we generally rappel in straight lines downward, that rock will be coming straight at you.
Head injuries and vertical activities don’t go well together, so be sure to wear a helmet.
Bring a partner
Always bring a friend. This is not only in the case of something going wrong; having someone that can get help or act as the rescuer is invaluable.
Having a partner with you is also essential so you can physically and visually check each other’s gear before stepping out over the edge. Make sure each other’s ropes are loaded correctly, check anchor systems are solid and carabiners are locked. Four eyes are better than two.
Related Questions
Why do belay/rappel devices have two holes?
Belay and rappel devices have two holes for a few different reasons. One reason is if you’re rappelling using a single strand of rope, the left or right slot on the device can be used for a left or right-handed person descending the rope. It’s easier for a right-handed person to use the slot on the right, as they’ll have their rope going down to their right side.
Another reason there are two slots is to accommodate two strands of rope.
Why extend a rappel device?
Extending a rappel device is a common way of rappelling. It puts your rappel device in a much more convenient and easy to use location – in front of your face, as opposed to down at your waist.
Instead of attaching your ATC directly to your harness’ belay loop, extend your rappel device by girth hitching a sling or PAS (personal anchoring system) through the hardpoints on your harness, then set-up your ATC on the sling or PAS.
What is needed to rappel?
To rappel, you will need:
- Solid anchor
- A static or dynamic rope (static is better, see my guide here)
- Harness
- Rappel device with a locking carabiner
- Other safety equipment, such as a helmet and a prussik, is highly recommended