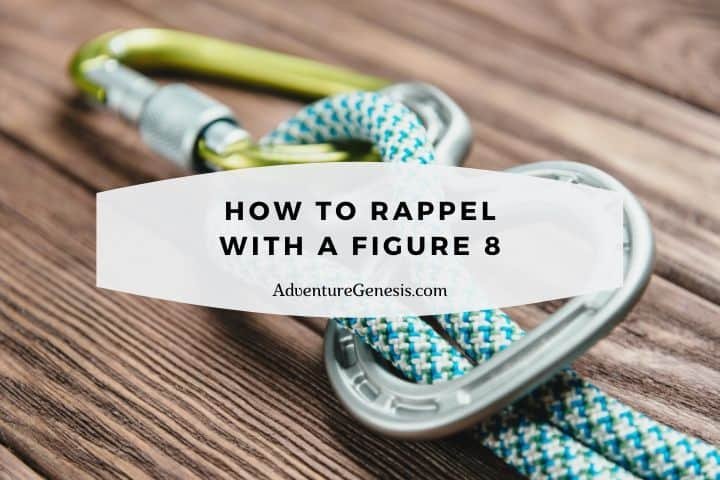
Ah, the humble figure 8— so simple; a big old number 8 shaped hunk of aluminum with a big hole and a small hole.
After talking to a friend, he told me that throughout his guiding career working with multiple outdoor companies, taking groups of clients out on a day of rappelling, the figure 8 device has been their go-to for the clients to control their descent (all clients would also be attached to a backup line controlled by them, of course).
Why did they choose the figure 8? Because they’re cheap, durable, easy to use, and offer a good amount of friction. It is good in some situations, but just like the Grigri, the figure 8 isn’t a jack of all trades kind of device.
In this article, I will explain what a figure 8 device is and how to properly use it for rappelling, as well as in what configurations it can be used. This guide should not be taken as a replacement for real-life experience training with the guidance of a professional.
How to Rappel with a Figure 8
1. Ensure all personal safety equipment is on and fitted correctly. This includes harness, helmet and personal safety system (this is the personal safety I use). Confirm that this last one is girth hitched through your harness’ hard points.
2. Connect yourself to the anchor using your personal safety.
3. Check that your rappel rope is connected to the anchor using at least two points of connection, with all carabiners locked. Ensure the rope is touching the ground and there is a stopper knot tied in both ends (this is good practice even if you are certain the ropes are touching the ground).
4. Use a locking carabiner to connect the figure 8 device to your harness belay loop.
5. Remove the figure 8 device from the carabiner. Hold the small hole of the figure of 8 in your left hand.
6. Feed a loop of one or both strands of the rope (depending on if your rappelling with double or a single strand of rope) with the section of rope going to the ground on the right— into the big hole, then over of the small hole, so the rope is now resting on the neck just below the big hole.
7. Clip the small hole of the figure 8 back to the carabiner on your belay loop and lock it.
8. Pull any rope slack through the figure 8 with your right hand. This can be done by pulling up on the brake strand of the rope (having the rope in this position; up, creates less friction and enables the rope to slide through the device easily). The rope should now be tight.
9. Perform safety checks: make sure you have a helmet and you have nothing hanging from your body that may get caught in the figure 8 device (i.e. hair, jewelry, etc.).
10. Ensure the locking carabiner is clipped through the figure 8’s small hole and onto your harness
11. Ensure the rope is fed through your device correctly. This means, with the device in front of you so the small hole is closest to you, the rope will run:
- from the anchor, into the big hole from above
- over the top of the neck
- under the metal and back out of the big hole
- down to the ground
12. Confirm that all carabiners in the system are locked.
13. Be sure to fully weight the rope, ensure that the rappel line is taking all of your weight before removing your personal safety.
14. When your safety check is complete, your personal safety can be disconnected.
15. The strand of rope that is running to your right side and coming out of the figure 8 to the right is the brake strand of rope in the system. This is what you use to control the speed of your descend. The slower the rope slides through your hands, the slower you will descend. Hold the brake strand of the rope tightly.
16. Lean back and get comfortable on the edge of the line you’re about to rappel. Slowly lessen your grip on the brake strand and allow the rope to slide through your hands.
17. Continue down the line, keeping your feet wider than hip-distance apart and directly in front of you. Use your feet you avoid bumping into any rocks. If you feel like you’re going too far either left or right and feel off-balance, walk your feet back to where you want to be. Rappel to the ground to complete the line.
Note: If you are left-handed, and prefer to have the brake strand of rope to your left side, you can do so by simply loading the 8 in the opposite direction, with the brake strand loaded on the left of the device.
Now, the figure 8 device has been around for a long time and is an extremely versatile tool for the vertical world. There are numerous ways of feeding the rope into the device to provide different friction levels and functions. I will cover the more common uses here.
What is a Figure 8 Device
The figure 8 is a rappel and belay device which most gear companies over the years have manufactured in one form or another.
Some gear manufacturers have versions that stray from the original, such as more square-shaped holes or ears on the sides, but they all operate under the same principles.
A couple of good options are the Petzl Huit and the Black Diamond Super 8.
The device works by creating friction due to bends in the rope, and contact with the metal of the device itself. The 8 can be used for belaying a climber, but its main intended use is for rappelling.
While this device is considered by most to be somewhat dated, and can be outperformed by the ATC in most ways and is rarely the top choice for people these days, there are certain situations that benefit from using an 8.
Some find rappelling with the 8 to be much easier and smoother than other devices. From what I’ve seen with my clients and people new to rappelling, this is especially the case.
Figure 8 Pros
- The device is easy to use and to load correctly.
- It’ll provide a smooth descent, even on thick, worn and dirty ropes, making it popular for large groups of people, rappelling on rainy days or in muddy caves.
- Inexpensive. Usually costs less than an ATC and certainly a GriGri.
- Versatile. Can be used with one or two ropes in numerous ways.
- The fig 8 doesn’t wear on your carabiners. The rope doesn’t come into contact with any carabiner you are using, therefore it doesn’t wear upon them in the same way an ATC like device would.
Figure 8 Cons
- A common complaint about the 8 is that the rope twists quite badly in the device. A few companies have tried to fix this problem by making the holes in the device squarer.
- Though there are multiple ways to belay with the figure 8, it still isn’t great to belay with.
- The 8 needs to be fully removed from the carabiner when being loaded. This can and does add to the risk of the device being dropped.
Different Configurations for a Figure 8 Device
One place where the 8 does stand out is in its numerous configurations and situations with which it can be used and still operate smoothly.
The 8 is designed to fit either one or two strands of rope. This could be one 8.5 mm diameter strand of rope or two 11 mm strands.
It’s quite modular in this way and is one of the only devices I’ve used that can still offer smooth rappels on well-used 11 mm+ ropes — which are usually a nightmare to feed through other devices. This also makes them ideal to use on muddy ropes, which are often hard to feed through an ATC.
Safety Using the Figure 8 for Rappelling
With almost all aspects of the vertical world, redundancy is essential. This means that if one thing fails, there is a backup in place.
Unlike the GriGri, which uses a built-in cam to create redundancy, the figure 8 device employs no such safety back up. This means that regardless of the configuration and rope setup you use, a prusik is essential when rappelling with a figure 8.
Related Questions
What carabiner works best with a figure 8 device?
Almost any locking carabiner will be a good match with a figure 8. The Petzl William or the Petzl Attache are both good choices.
What is a good helmet to use whilst rappelling?
The chances of bumping your head whilst rappelling are reasonably high. Because of that, when buying a helmet for rappelling, I’m looking for durability as my number one factor. The Black Diamond Half Dome is a good option and is a decent compromise between weight, fit, and durability.